
Ahhhh ordering…..Finally it was time to order materials for our maker space. We had some idea of what we wanted and needed, but it quickly became clear we would be better at ordering next year once we used the materials and figured out what worked for our students. For example, we were not sure which coin cell battery holders to get; they are expensive and as novices we are not sure how they all work. We got some of each, so we can learn how to use them and be educated on what works best with certain projects.

We began ordering supplies for our new space by thinking about what we explored in Lucie’s course. We came to this course as a group of three, two women and one man. Gregg was not interested at all in the e-textiles while we loved them. We were not interested in creating paper bridges that would hold the most reams of paper, but Gregg was completely engaged. So when we were ordering we tried to consider all learners: both boys and girls. We learned from our week at the Generator, boys and girls are different and approach learning differently. We purchased materials with this in mind.
-
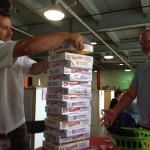
- Gregg loved this challenge!
-
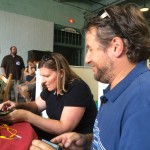
- Kate enjoyed the eTextiles.
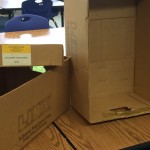
At school Gregg and Aimee both had LINX Kits, stored in boxes in a closet deep in the school. With this course and project, we realized they were perfect for the makerspace. We suspect that boys will be more drawn to these building materials, while the e-textiles will appeal more to girls. The challenge will be to break these stereotypes, so we have some playing to do!

Lucie’s course offered the best variety of materials to create with, and we know its important to have a wide variety supplies. Here is what we ordered:
- LED Lights . . . we ordered a variety of sizes and types of LED lights.
- Motors . . . we decided on basic hobby motors to start
- Sensors . . . we ordered light, motion and sound sensors
- Switches . . . we ordered Lilypad on/off switches and a variety pack of button switches
- Batteries . . . we ordered coin cell batteries for eTextile projects
- Battery Holders . . . we ordered a few types to see which we prefered
- Wire . . . Jump wires, rolls of wire and alligator clips
- Conductive material . . . we ordered conductive thread and tape
-

- Spark Fun
-

- Amazon
-
- Amazon
We still have more to get, but plan on taking trips to arts and craft stores, the dollar store and hardware stores for items like wire strippers, needle-nosed pliers, felt, feathers, and other maker materials. Our teammate, Gregg, got a huge bin of craft supplies for three dollars at a yard sale! We wish we would have found it before him.
.


